

In the world of gardening, it’s referred to in reverent tones: “black gold.” It’s not a secret mineral or an expensive, store-bought bag of magic. It’s something you can make for free, right in your backyard, using little more than your kitchen scraps and yard waste. We’re talking about compost, the single most powerful, transformative, and essential ingredient for a thriving garden. The process of composting is simply nature’s own recycling system, harnessed in your backyard.
For many new gardeners, composting can seem intimidating. It feels like a complicated science project, with talk of “ratios,” “temperatures,” and “turning schedules.” This fear leads many to miss out on the most impactful and rewarding part of sustainable gardening.
The truth is, composting is not complicated. You cannot fail at it. Nature will do the work whether you pay attention or not. This guide is here to demystify the process, break it down into simple, actionable steps, and give you the confidence to start turning your “trash” into treasure.
What is Composting, Anyway?
At its simplest, composting is the natural process of decomposition. It’s what happens on a forest floor when leaves, fallen branches, and other organic matter are broken down by millions of microorganisms (like bacteria, fungi, and worms) and turned back into a nutrient-rich, soil-like material.
When you create a compost pile, you are simply curating and accelerating this process. You provide the ingredients, and a “micro-herd” of beneficial workers shows up to feast, turning your apple cores, eggshells, and dry leaves into a dark, crumbly, sweet-smelling substance that is the ultimate superfood for your garden.
Why Bother? The Overwhelming Benefits of Black Gold
If you’re going to put in the effort, you want a good return. Composting delivers on every level: for your wallet, for your plants, and for the planet.
It’s the Best Garden Amendment… Period.
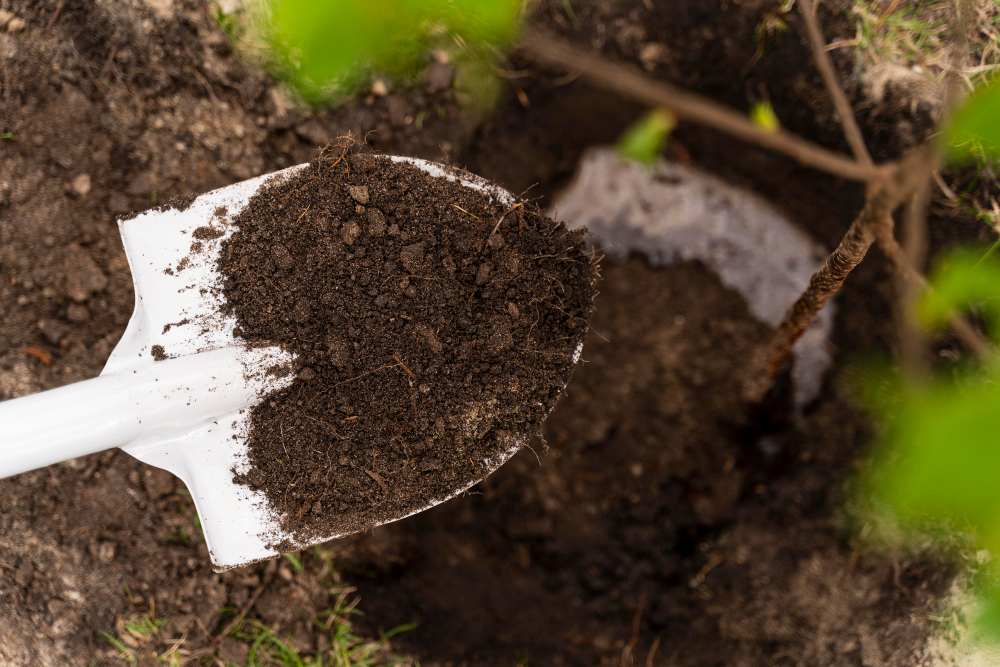
Finished compost is a miracle-worker for all soil types.
- For Heavy Clay Soil: Compost’s bulky organic matter physically separates the dense clay particles, creating air pockets that allow for better drainage and root growth.
- For Sandy Soil: Compost acts like a sponge, helping the soil retain critical moisture and nutrients that would otherwise just wash away.
- It’s a Slow-Release Fertilizer: Unlike synthetic fertilizers that give plants a quick, chemical “jolt,” compost provides a broad spectrum of macro- and micronutrients (like nitrogen, phosphorus, and potassium) that are released slowly, feeding your plants steadily all season long. It is a cornerstone of The Science of Soil.
- It Boosts Soil Life: Compost is teeming with the beneficial microorganisms that form the “soil food web.” These microbes help plants absorb nutrients and can even suppress soil-borne diseases.
It Saves You Money
Why pay for something you can make for free?
- Reduces Fertilizer Costs: A healthy supply of compost can eliminate the need to buy expensive bags of synthetic fertilizers.
- Cuts Down on Soil Costs: Instead of buying dozens of bags of “garden soil” to fill a new bed, you can amend your native soil with your own compost for a fraction of the cost (or for free!). It’s the best method for Reviving Your Garden Soil: Natural Methods for Rejuvenating Tired Earth.
- Shrinks Your Trash Bill: By composting kitchen scraps and yard waste, you significantly reduce the volume of trash your household produces, which can lead to lower waste-hauling fees.
It’s a Powerful Act for the Planet
When you throw an apple core in the trash, it gets buried in a landfill. Deprived of oxygen, it rots anaerobically, releasing methane—a greenhouse gas over 25 times more potent than carbon dioxide. According to the U.S. Environmental Protection Agency (EPA), food scraps and yard waste make up more than 30% of what we throw away. By composting, you are actively stopping this process, reducing your carbon footprint, and fighting climate change from your own kitchen.
The Simple Science: A Recipe for Decomposition
To get fast, odor-free compost, you just need to balance four key ingredients. Think of it as making a cake.
- “Greens” (Nitrogen): These are the “wet,” fresh materials. They are the “gas” for the fire, providing protein and nitrogen for the microorganisms to grow and reproduce.
- “Browns” (Carbon): These are the “dry,” woody materials. They are the “fuel” for the fire, providing energy and carbon. They also create air pockets, keeping your pile from becoming a stinky, matted mess.
- Water (Moisture): The microbes in your pile need water to survive, just like any other living thing.
- Air (Oxygen): This is the key to odorless composting. An “aerobic” pile (one with oxygen) smells earthy and pleasant. An “anaerobic” pile (one without oxygen) smells like a swamp and is the result of a matted, wet, or compacted pile.
The Golden “Greens vs. Browns” Ratio
This is the one “sciency” part that scares beginners, but it’s simpler than you think. Experts talk about a C:N (Carbon-to-Nitrogen) ratio of 30:1. This is confusing.
A much simpler way to think about it is by volume: Aim for 2 to 3 parts “Browns” for every 1 part “Greens.”
- Too many Greens (like a pile of grass clippings): Your pile will be a slimy, wet, stinky, ammonia-smelling mess.
- Too many Browns (like a pile of dry leaves): Your pile will be dry and will just sit there, taking decades to break down.
Getting this ratio right is the secret to a fast, “hot” pile that doesn’t smell. When in doubt, always add more browns.
What You Can (and Cannot) Put in Your Compost Pile
Pin this list to your fridge. It’s the key to a healthy, pest-free pile.
The “YES” List (Green = Nitrogen / Brown = Carbon)
- Greens (Nitrogen):
- Vegetable scraps (peels, cores, stems)
- Fruit scraps (peels, cores, rinds)
- Coffee grounds (a fantastic “green”!)
- Tea bags (staples removed)
- Eggshells (crushed)
- Fresh grass clippings (in thin layers)
- Manure from herbivores (chickens, rabbits, goats, cows)
- Browns (Carbon):
- Dry, dead leaves (the #1 best “brown”)
- Shredded cardboard (cereal boxes, toilet paper rolls)
- Shredded newspaper
- Straw or hay
- Pine needles (in moderation)
- Wood chips or sawdust (from untreated wood only)
- Twigs and small branches (take longer to break down)
- Dryer lint
The “NO” List (Avoid at All Costs)
- Meat, Fish, or Bones: These will decompose, but they will smell and attract rodents, raccoons, and other pests.
- Dairy Products (Cheese, Milk, Yogurt): Same as above. Pests love them.
- Greasy or Oily Foods: Oil coats materials and prevents them from breaking down, and it will attract pests.
- Pet Waste (Dog or Cat): Can contain harmful pathogens and parasites that you do not want in your vegetable garden.
- Diseased Plants: Don’t compost plants you pulled due to fungal disease or pests, as a “cold” pile won’t get hot enough to kill the pathogens.
- Weeds with Seeds: If you have a “hot” pile, it’s fine. But in a “cold” pile, you are just creating a weed-seed-bomb to spread on your garden later.
- Treated Wood / Large Branches: Will not break down.
- Black Walnut Debris: Contains “juglone,” a chemical that is toxic to many garden plants.
Choosing Your Composting Style: A System for Every Yard
There is no one “right” way to compost. The best system is the one you will actually use.
Option 1: The “Cold” Pile (Passive Composting)
This is the “no-work” method. You simply find a corner of your yard, build a pile, and add to it as you go.
- Pros: Requires zero effort. You just pile up leaves, grass, and kitchen scraps and walk away.
- Cons: It is very slow. It can take 1-2 years for you to get usable compost. It’s also more likely to be anaerobic (smelly) or to attract pests if you aren’t careful about burying food scraps.
Option 2: The “Hot” Pile (Active Composting)
This method is for those who want compost fast. The “hot” refers to the pile’s internal temperature, which can reach 140-160°F—hot enough to kill weed seeds and pathogens.
- Pros: It’s incredibly fast (you can have finished compost in 2-4 months). It’s the “gold standard” for creating high-quality, safe compost.
- Cons: It requires active management. You need a “critical mass” (a pile at least 3x3x3 feet) and you must turn the pile regularly (e.g., once a week) to aerate it.
Option 3: Enclosed Bins and Tumblers
These are great for small yards, urban settings, or anyone who wants a tidier look.
- Enclosed Bins: These are stationary plastic bins (often black) with a lid on top and a door at the bottom. They keep the pile tidy and are great at deterring pests.
- Tumblers: These are barrels on a frame that you can “tumble” or spin, making the “turning” process much easier. They are clean and pest-proof. However, they can be hard to turn when full and often work best when you have two (one “cooking” and one “filling”).
Specialty Option: Vermicomposting (Worm Composting)
This method uses a special type of worm (Red Wigglers) in a bin to break down food scraps. It’s an excellent indoor/outdoor option for small spaces. We have a whole guide on Vermicomposting.
How to Start Your First Pile: A Step-by-Step Guide
Ready to make your first batch? Here’s the simple, 5-step “hot pile” method.
- Choose Your Spot: Find a level, well-drained spot. Partial shade is ideal, as a spot in full, blazing sun may dry out too fast. Do not place it on a wooden deck (it will stain/rot) or against your house. Bare earth is best.
- Build Your Base: Start with a 4-6 inch “fluff” layer of “browns.” Small twigs, shredded cardboard, or straw work perfectly. This layer is critical for creating airflow from the bottom.
- Start Your Layers (The Lasagna Method): Now, build your pile like a lasagna.
- Add a 3-4 inch layer of “Greens” (your kitchen scraps, coffee grounds, etc.).
- Add a 6-8 inch layer of “Browns” (your dry leaves, shredded paper).
- Optional: Add a thin shovelful of garden soil or finished compost. This “inoculates” the pile with microbes.
- Water As You Go: After every few layers, lightly water the pile. This is the step everyone forgets. You want the pile to have the consistency of a wrung-out sponge—moist, but not dripping.
- Repeat and Cover: Continue layering greens and browns until your pile is at least 3 feet high. Finish with a “cap” of browns to seal in moisture and discourage flies.
Maintaining Your Pile
Now that it’s built, your job is simple: maintain air and water.
- Water: Keep the “damp sponge” consistency. If it doesn’t rain for a week, you may need to water your pile.
- Turn: This is the key to hot composting. Every 1-2 weeks, use a pitchfork to “turn” the pile. This moves the material from the dry, cool outside into the hot, active center and re-injects the pile with a massive dose of oxygen. You’ll know it’s working when you see steam rise from the center—that’s the heat of decomposition!
Troubleshooting Common Composting Problems
You can’t “break” your compost, but you can run into these common, easy-to-fix issues.
- Problem: My pile stinks like ammonia or rotten eggs.
- Cause: Too many “Greens” (ammonia) or it’s too wet and compacted (rotten eggs). It has gone anaerobic.
- Fix: Add more “Browns” (leaves, cardboard) and turn the pile thoroughly to get air into the center. This fixes 90% of smell problems.
- Problem: My pile is not heating up / nothing is happening.
- Cause: It’s too dry, it’s too small, or it doesn’t have enough “Greens.”
- Fix: Add water! Get it to that “damp sponge” feel. If it’s still slow, add more “Greens” (coffee grounds or fresh grass clippings are a great “activator”) and turn it in.
- Problem: I have rodents or raccoons.
- Cause: You are adding meat, dairy, or oily foods. Or, your food scraps are exposed.
- Fix: Stop adding “No” List items. When you add kitchen scraps, bury them in the center of the pile and cover them with a thick layer of browns or finished compost.
How to Know When It’s Ready (And How to Use It)
Your patience is about to pay off. You’ll know your compost is finished when it meets these criteria:
- Color: It’s a deep, dark, rich brown-black.
- Smell: It smells earthy, like a forest floor after a rain. It should not smell sour, like ammonia, or like old food.
- Texture: It’s crumbly, moist, and light.
- Identity: You can no longer tell what the original ingredients were. The apple cores, leaves, and coffee grounds are all gone, transformed into a uniform material.
Using Your Black Gold
- As a Soil Amendment: This is the primary use. Mix 2-4 inches of finished compost into the top 6-8 inches of your garden beds before planting.
- As a Mulch: A 1-2 inch layer on top of the soil is a fantastic, nutrient-rich Why Use Mulch in Your Vegetable Garden?.
- In Potting Mix: Create your own super-soil for containers. A great recipe is one part compost, one part peat moss or coco coir, and one part perlite or vermiculite. It’s a key ingredient in the Best Soil for Container Vegetables: Crafting the Perfect Potting Mix for a Bountiful Harvest.
- As a Top-Dressing: Gently spread a 1/2-inch layer around the base of existing plants (like a Vegetable Gardening for Beginners starter) and water it in.
Composting is a journey, not a destination. It’s a continuous, satisfying cycle that connects your kitchen to your garden. It transforms waste into wealth, builds better soil, grows healthier plants, and is the single most important skill a gardener can learn. Don’t be afraid to start. Nature is on your side, and the “black gold” you create is your reward.
Check out the author’s book here: The Year-Round Vegetable Garden for Beginners.
Leave a Reply