
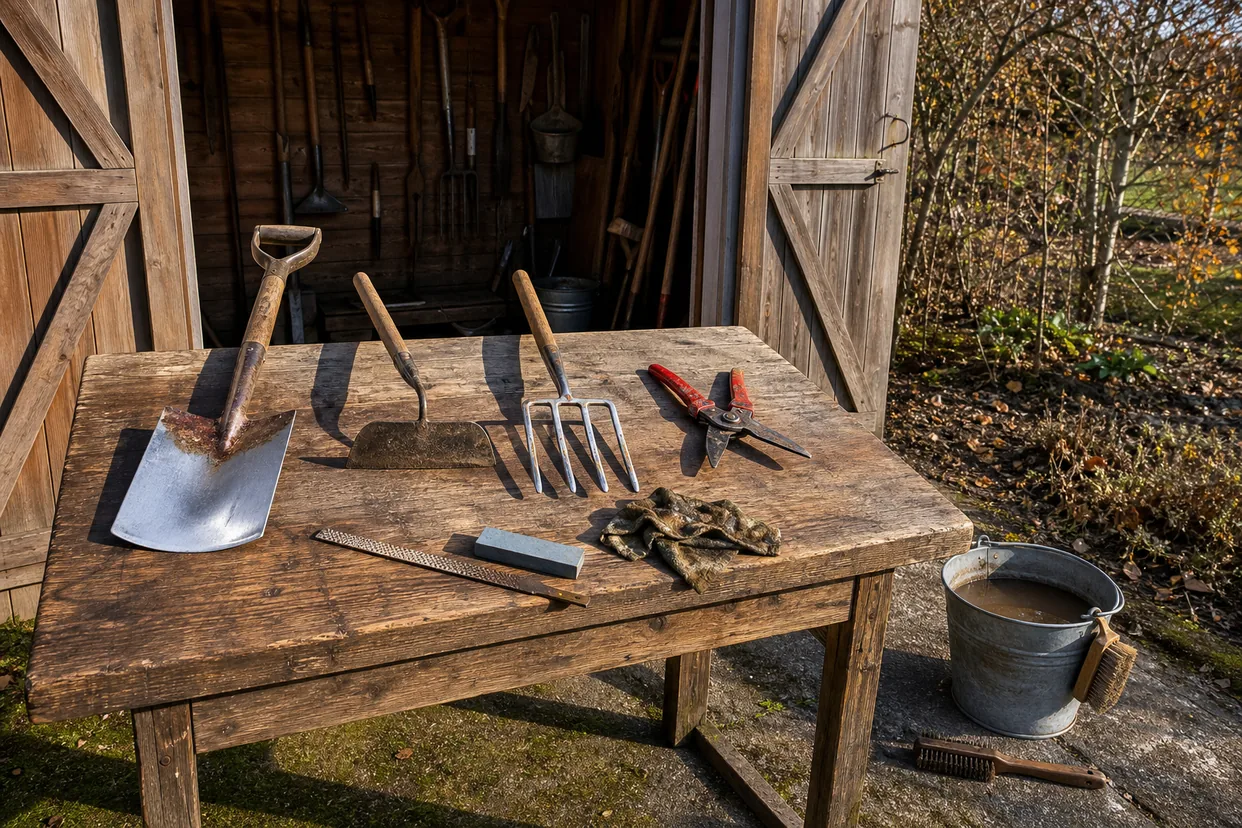
A spade left dirty in a damp shed all winter comes out in March pitted, blunt, and slightly heavier for the rust. Do that three years running and it is finished. Winterizing garden tools is the small piece of work that stops it, and it takes one afternoon a year.
There is a second reason, and it matters more than the metal. Tools carry disease from bed to bed. A pruner that took out a blighted tomato in September will happily plant the same spores into a fruit tree in February.
Winterizing Garden Tools at a Glance
| When | After the last cleanup, before the first hard freeze |
| Time | An afternoon for a full shed |
| You need | Bucket, wire brush, mill file, whetstone, oil, rags |
| Clean | Every tool, every time |
| Disinfect | Anything that cut a diseased plant |
| Sharpen | Spades, hoes, pruners, shears |
| Oil | Metal and wooden handles both |
| Store | Hung up, indoors, dry and off the floor |
Why It Matters More Than It Sounds
Three separate problems, one afternoon of work.
Rust. Soil holds moisture against steel, and a film of damp soil left on a blade all winter is a rust factory. Rust pits the surface, and a pitted blade never takes a clean edge again.
Disease. Fungal spores and bacteria survive on tool surfaces. Minnesota Extension’s guidance on cleaning and disinfecting gardening tools exists because the transfer is real and documented.
Effort. A sharp hoe cuts weeds at the surface with a push. A blunt one drags, tears, and makes you work twice as hard for a worse result. Most people believe hoeing is exhausting because they have never used a sharp hoe.
Winterizing Garden Tools Starts With Cleaning
Nothing else works until the soil is off, so winterizing garden tools always starts at the bucket.
- Scrape the bulk off with a putty knife or an old chisel, working from the shoulder toward the tip.
- Wash with water and a stiff brush. A bucket and a hose outdoors is faster than a sink.
- Attack the sap on pruners and loppers with rubbing alcohol or mineral spirits, which dissolves resin that water will not touch.
- Dry completely. Not nearly dry — completely. Ten minutes in the sun or a rub with an old towel.
That fourth step is where most attempts fail. A tool put away damp rusts under the oil you just applied.
Wooden handles get the same treatment with less water. Wipe them rather than soaking them, and never leave a wooden handle standing in a bucket.
Step Two: Take the Rust Off
Light surface rust comes off with a wire brush and five minutes of effort. Work with the grain of the steel, not across it.
For heavier rust, soak the head overnight in white vinegar, then scrub with steel wool and dry it immediately and thoroughly. Vinegar strips rust and it also strips any protection, so the tool goes straight from the rinse to the towel to the oil.
Never mix cleaning products. Bleach with vinegar, or bleach with ammonia, releases chlorine gas. Use one thing at a time, rinse between, and work outdoors or with the door open.
Deep pitting will not come out, and chasing it with a grinder does more harm than the rust did. Clean it, oil it, and accept the tool has a history.
Winterizing Garden Tools That Cut
Sharpening is the part people avoid, and it is the part of winterizing garden tools that changes how the next season feels. These are not chisels; a working edge is enough.
Spades, hoes, and edgers. Clamp the head, take a 10-inch mill file, and work along the existing bevel at roughly the same angle it already has. File in one direction only, pushing away from you, and lift on the return. Twenty strokes usually does it. Only the bevel side gets filed; the flat back gets one light pass to remove the burr.
Pruners and loppers. Bypass pruners have a single bevel on the outside of the cutting blade. Sharpen that face only, with a whetstone or a diamond file, following the curve. Do not touch the flat inner face except to wipe off the burr.
Shears and scythes. Same principle, larger stone, more patience.
Illinois Extension’s tool readying guide makes the same point about filing out nicks. A notch in a blade tears rather than cuts, and it gets worse every time you use it.
Wear a stout glove on the hand that holds the blade, and always file away from your body.
Disinfecting After a Season of Disease
Cleaning removes soil. Disinfecting removes what lived in it.
- Rubbing alcohol, 70%, wiped or sprayed on. Fast, no rinse needed, and it does not corrode. This is the everyday choice.
- Diluted bleach, one part to nine parts water, for a two to three minute soak. It works, and it corrodes steel, so rinse and dry immediately afterward.
- Household disinfectant spray for a quick wipe between plants during the season.
Disinfect anything that touched blight, canker, clubroot, or mildew. In a bad year that means every blade in the shed. If squash and cucumbers went down to mildew this summer, the reasons are in powdery mildew treatment, and the pruners that touched them need the alcohol.
Seed trays deserve the same discipline, since damping off overwinters in dirty plastic. That connection is spelled out in damping off disease.
Oiling Metal and Wood
Oil is what makes winterizing garden tools last through six damp months rather than six weeks.
Metal. A few drops of light machine oil, camellia oil, or boiled linseed oil on a rag, wiped over every bare steel surface. A thin film is all you need, and a thick one collects dust.
Wood. Sand any splinters with medium paper, then rub boiled linseed oil into the handle. Two thin coats, a day apart, and wipe off whatever has not soaked in after twenty minutes.
Oily rags can catch fire on their own. Linseed oil generates heat as it cures, and a crumpled rag in a bin can reach ignition temperature by itself. Spread used rags flat outdoors until they are stiff and dry, or seal them in a can of water. Never leave them balled up in the shed.
The old trick of a bucket of oiled sand for storing hand tools is worth a mention and a caution. It works if the sand stays dry, and it traps moisture against the steel if it does not. A rag and a hook are simpler and safer.
Handles, Ferrules, and Loose Heads: What Actually Breaks
Now check the parts that fail rather than rust.
- Cracks in a wooden handle. Wrap with tape as a temporary fix, and replace before spring, because a shaft that snaps under load is how people get hurt.
- Loose heads. A spade head that rocks on its shaft will break. Tighten the rivet or wedge, or take it to someone who can.
- Ferrules — the metal collar joining head to handle. Rust here is hidden and structural.
- Springs and pivots on pruners. Drop of oil, work them a dozen times, check the blade still closes true.
This is also the moment to notice what you actually used all season, and what you never touched. That list belongs in the garden journal alongside the crop notes, and it is a better guide to buying than any catalogue. The core kit worth owning is in essential gardening hand tools.
Winterizing Garden Tools With Engines and Batteries
Anything with a motor needs a different routine, and getting it wrong costs real money.
Fuel engines. Either run the tank dry, or fill it and add stabilizer. Half a tank of untreated gasoline over winter turns to varnish in the carburetor. Change the oil while the engine is warm, clean or replace the air filter, and pull the plug to check it.
Batteries. Lithium tools store best at around half charge, in a dry place that stays above freezing and below room heat. A battery left flat all winter may never take a full charge again. One left in an unheated shed at 10°F ages fast.
Blades. Mower and trimmer blades come off, get cleaned, get sharpened, and go back on. Grass sap is acidic and eats the underside of a mower deck.
Hoses, Sprayers, and Irrigation
Water is the thing that actually destroys equipment over winter, because it expands when it freezes.
- Shut off the outdoor supply at the indoor valve and open the outside tap to drain the pipe.
- Drain hoses completely by stretching them downhill, then coil them loosely and store them under cover. A coiled hose full of water splits at the first hard freeze.
- Blow out or drain drip lines and remove the filters and pressure regulators, which are the parts that crack. The system layout is in drip tape installation.
- Empty and rinse sprayers, then store them with the nozzle off and the plunger loose.
- Drain rain barrels or leave the tap open, since a full barrel of ice splits the seams — see rainwater harvesting for vegetable gardens.
Pots, Trays, and Everything Plastic
Ten minutes here saves a tray of seedlings in March.
Wash pots and modules in soapy water and scrub off the mineral crust. Then dip them in a weak bleach solution, or wipe them with alcohol. Dry them fully and stack them somewhere they will not blow away.
Terracotta needs the same wash and then a dry frost-free store, since a wet clay pot cracks when it freezes. Cold frames get their glass cleaned now too. Winter light is scarce, and dirt on the glazing costs real growth, as noted in cold frame gardening.
The Order That Saves You Walking
Winterizing garden tools goes faster in a sequence, and the sequence exists because each step ruins the one before it if you get them backwards.
- Empty the shed onto a tarp. Everything, including the things at the back you forgot you owned.
- Sort into three piles: working, needs repair, and beyond saving. Be honest with the third pile.
- Wash the whole working pile at once, outdoors, then leave it in the sun to dry while you deal with the rest.
- Rust and sharpen next, because filing a wet blade clogs the file and rusts the tool you just cleaned.
- Oil last, when everything is dry and sharp. Oil before sharpening and the file slides; oil before drying and you seal moisture in.
- Hang it all back on a swept floor, with the cutting edges covered.
The repair pile is the one that decides whether the shed improves or slowly degrades. A cracked handle put back on the hook in November is a cracked handle in April. The moment to fix or replace it is now, when nothing is urgent.
The beyond-saving pile deserves a look too. A spade with a snapped shaft still has a sound head. Rehandling one is a cheap fix rather than a new tool. Broken pruners with good blades are worth stripping for the spring, and the rest goes to scrap metal rather than the trash.
One more thing goes on the tarp with everything else: the plant supports. Stakes, canes, cages, netting, and twine all come in at the end of the season and all rot or rust if they overwinter outside. Bamboo canes last three seasons under cover and one season standing in the ground. A bundle stored dry is worth more than a bundle left in the bed.
Where Winterizing Garden Tools Ends: Storage
Where the tools sleep matters as much as how well you cleaned them.
- Hang everything. Tools standing on a concrete floor wick moisture straight up into the handles.
- Dry beats warm. An unheated shed is fine if it is dry and ventilated. A damp garage is worse than a cold one.
- Keep the cutting edges covered, with a scrap of hose slit lengthways over a blade or a purpose-made sheath.
- Store handles up or down consistently, so you can find things in the dark in March.
Winterizing Garden Tools Mistakes
| Mistake | What it costs |
|---|---|
| Putting tools away damp | Rust under the oil, by January |
| Skipping the disinfecting step | Last year’s blight in next year’s beds |
| Sharpening both faces of a pruner | A blade that never cuts cleanly again |
| Leaving a hose full of water | A split hose and a cracked tap |
| Balling up linseed rags | A genuine fire risk in a closed shed |
| Storing batteries flat in the cold | A battery that will not hold charge |
Winterizing Garden Tools Questions Answered
How sharp does a spade really need to be?
Sharp enough to slice a root cleanly, not sharp enough to shave with. A file edge is right; a razor edge chips on the first stone.
Can I use motor oil on my tools?
You can, and it works, though used motor oil carries contaminants you would rather not spread on soil. Light machine oil or boiled linseed oil costs little and is cleaner.
Is bleach or alcohol better for disinfecting?
Alcohol, for most jobs. It works on contact, needs no rinsing, and does not corrode. Bleach is stronger but harder on steel, so keep it for a soak of shovels rather than a wipe of pruners.
What about stainless steel tools?
Still clean and dry them. Stainless resists rust rather than being immune to it, and the edge still needs sharpening.
When is the right week to do all this?
After the beds are cleared and before the first hard freeze, which for most of the country means late October or November. The other honest answer is: on the first day it is too wet to be outside.
An Afternoon That Buys Ten Years
Winterizing garden tools is the least interesting job in the calendar and the one with the best return. Scrape, wash, dry, sharpen, oil, hang. The spade you look after outlives three of the ones that spend their winters point-down in a wet shed. It also works better every day you use it.
Check out the author’s book here: The Year-Round Vegetable Garden for Beginners.


Leave a Reply