
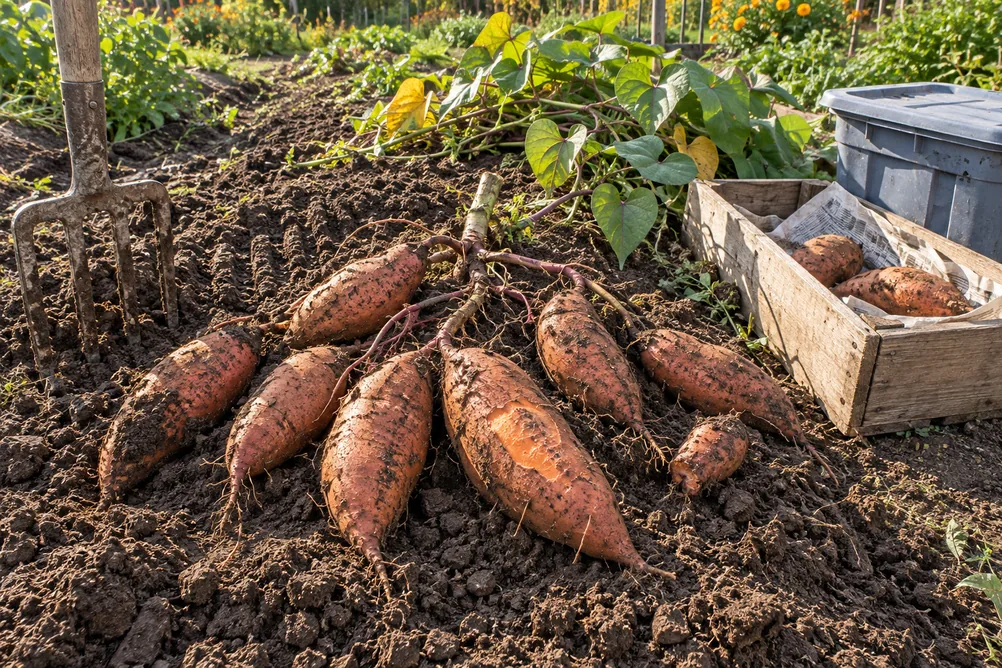
The first sweet potatoes I ever dug were a disappointment, and the fault was mine. I ate one that same evening, boiled, and it tasted of nothing much, like a starchy carrot. Ten years later I finally know why. A sweet potato straight out of the ground has not yet become sweet. The sugars come from a week of warm, humid rest after the harvest. Growing sweet potatoes is easy in the ground and mostly a matter of heat. The part that decides whether they taste of anything happens on a shelf, after you have finished digging.
In short, this guide follows the crop from a sprouting root on the windowsill to a box in the basement in January. Growing sweet potatoes asks for almost nothing between planting and harvest, which is rare among vegetables. However, the crop also punishes a gardener at both ends. Plant the slips in cold soil and they sulk, and skip the cure and they taste flat. Get those two things right, though, and a ten-foot row will feed a family through the winter.
Growing Sweet Potatoes at a Glance
| The short answer | |
|---|---|
| Start from | Slips, the rooted shoots of a sprouted root, not seed |
| Soil temperature | 65°F at planting, never earlier |
| Spacing | 12 inches apart on a ridge, rows 3 feet apart |
| Water | Daily for two weeks, then half an inch a week, none in the last month |
| Days to harvest | 90 to 120, before the first frost |
| Cure | 80 to 85°F and 85 to 90 percent humidity for 7 to 14 days |
| Store | 55 to 60°F, dark, until spring |
| Yield | 15 to 30 pounds per 10-foot row |
Sweet Potatoes Are Not Potatoes, and Not Yams
The name misleads twice. A sweet potato has no relation to the white potato, which is a nightshade that grows from a tuber. Instead, it belongs to the morning glory family, and the part you eat is a swollen root. That matters when growing sweet potatoes, because a root crop and a tuber crop want different handling. As a result, there is no seed potato to chit, no hilling of stems, and no green skin to worry about.
Nor is it a yam, whatever the can in the store says, because true yams are something else entirely. They are a tropical crop from a different plant family, with rough brown skin and white flesh. Few gardeners in North America ever grow one. Illinois Extension’s sweet potato page makes the distinction plainly. The orange “yam” in an American supermarket is a soft-fleshed sweet potato. The label is a habit left over from the 1930s.
Growing Sweet Potatoes from Slips
Sweet potatoes grow from slips, which are the shoots that sprout from a mature root. You can buy them by mail in bundles of 25, and that is the simplest route the first year of growing sweet potatoes. However, the shoots are also easy to raise at home from a root bought at the market. I have done it every spring since the second year. Either way, start about six weeks before your planting date. Penn State Extension’s sweet potato guide counts three to five slips from each root.
Wash the root first, because supermarket roots often carry a sprout inhibitor, and a good scrub removes most of it. Then lay it on its side in a tray of damp sand or potting mix, half buried, and keep it warm. The University of Maryland’s home garden sweet potato page gives 75 to 85°F as the range for sprouting. A heat mat under the tray does the job in a cool house, and the top of a refrigerator does it in a warm one. Cover the tray with plastic until the first shoots appear, then move it under a grow light for 14 to 16 hours a day.
Then, when a shoot is six to ten inches long, twist it off at the base. It comes away with a few small roots, or none, and either is fine. Stand the slips in a jar of water for a few days. White roots appear along the stem, and at that point they are ready. Harden them off in the same way as any tender transplant, following the steps in hardening off plants. The glass-of-water method, with a root hanging on toothpicks, also works, but it is slower and produces fewer slips.
Heat and Soil: What the Roots Need
Growing sweet potatoes is above all a matter of warmth. The plant is tropical, and it does nothing below 60°F except wait. Consequently, the soil sets the planting date, not the calendar. The figure is 65°F at four inches deep, and reliably so, which in most of the country means two or three weeks after the last frost. A cheap soil thermometer settles the question, so buy one. The method in soil temperature for planting takes a minute a day.
The site also needs full sun, and eight hours is better than six. Check the spot with a garden sun map before you commit a row to it. The soil should be loose, sandy if you can get it, and drained. The roots grow in the top eight to ten inches, and a heavy clay turns them long and thin. Also, keep the nitrogen down. A bed that grew a heavily fed crop the year before will grow enormous vines and roots the width of a pencil. An inch or two of compost worked into the ridge is plenty, and I add nothing else.
The pH is a detail that matters more here than for most crops. Sweet potatoes tolerate acid soil, and a range of 5.8 to 6.0 discourages scurf, a fungal disease that stains the skin. Therefore, if your soil sits above 6.5, do not lime it for this crop. A soil test tells you where you stand, and how to read a soil test report explains the numbers.
Growing Sweet Potatoes in Containers
A gardener without a bed can still grow a decent crop in a large container. First, the pot must be big, at least 15 gallons, and half a whisky barrel is better. Fill it with a light mix rather than garden soil, following the recipe in best soil for container vegetables. Then plant three slips in a barrel and let the vines spill over the sides. Choose a bush variety, because a standard vine runs 20 feet, and Porto Rico or Vardaman spread only about two feet.
Containers warm faster than the ground, which helps in the north. On the other hand, they also dry faster, so a barrel on a hot patio needs water most days in August. The yield is smaller than a ridge in the ground, perhaps five pounds per barrel. In exchange, the roots are cleaner and the harvest is a matter of tipping the barrel over.
Planting Slips on a Ridge
Growing sweet potatoes on a ridge, not on the flat, is the rule in the ground. Rake the soil into a mound eight to twelve inches high and a foot wide. The ridge warms sooner, drains better, and gives the roots room to swell. In a raised bed, the bed itself does that job, and the slips go straight into the mix described in raised bed soil mix. Black plastic laid over the ridge two weeks ahead warms it faster still. It is a common trick north of the Ohio River.
Next, set the slips 12 inches apart along the ridge, with rows three feet apart for a spreading variety. Bury each one deep, with at least two leaf nodes underground. Roots form at the nodes, and the buried nodes are where the sweet potatoes grow. In contrast, a slip planted with only its roots in the soil makes a fine vine and a thin crop. Water each slip in well, then water daily for the first two weeks until the plants stand up and start to run. Plant on a cloudy afternoon if you can, since a hot noon wilts a fresh slip to nothing.
Caring for the Vines Through Summer
Once the vines cover the ridge, growing sweet potatoes becomes a matter of leaving them alone. The vines shade out weeds, and the roots reach deep. Half an inch of water a week is enough in most soils. The first 50 to 60 days after planting are the exception, since that is when the roots set. A drought in that window costs you the crop. Then, in the last three or four weeks before harvest, stop watering altogether. Wet soil late in the season splits the roots and shortens their storage life. If the leaves yellow in a wet August, signs of overwatering explains what you are seeing.
Vines root wherever a node touches the soil, and each of those roots pulls energy from the main crop. For that reason, lift the vines every couple of weeks, gently, and lay them back down, so those side roots break. Do not cut them, though. A mulch of straw between the ridges keeps the soil warm at night and the weeds down. The choices in organic garden mulch all suit this crop.
Pests are few. Deer eat the vines, and voles and mice eat the roots from below. A fence or a container is the answer to both. Flea beetles pit the leaves in June, but they rarely matter. The serious problems are scurf and the sweet potato weevil, which lives only in the Deep South. Both have the same prevention: certified disease-free slips, and a rotation of four years before the crop returns to the same bed. The plan in vegetable crop rotation accommodates a four-year gap without trouble.
When and How to Dig
Most varieties mature in 90 to 120 days, and the packet or the catalog gives the number for the variety you are growing. After about 85 days, scratch into the side of the ridge with your hands and feel for the size of the roots. In addition, the leaves yellow a little when the crop is mature. The firm deadline is the first frost, because a frost kills the vines. Decay then travels from a dead vine down into the roots within a day. Know your date from first frost date and plan to dig a week before it. If a frost catches you, cut the vines at the soil line at once and dig the same day.
Choose a dry day for digging, and use a garden fork, not a spade. Then start a foot out from the plant and work inward, lifting the whole ridge rather than stabbing into it. The roots spread wider than you expect. Moreover, the skin of a fresh sweet potato is as thin as paper, so every scrape is a wound that rots in storage. Lay them on the ground in the shade for an hour to dry, brush off the soil with your hands, and do not wash them. Sort them as you go: the cut and bruised ones go to the kitchen this week, and the sound ones go to the cure.
Curing: The Step That Makes Growing Sweet Potatoes Worth It
A freshly dug sweet potato is starchy and bland, and the skin is scratched in a dozen places. Curing fixes both problems at once. Held warm and humid for a week or two, the root heals its wounds under a new layer of skin. Meanwhile, its enzymes convert starch into sugar. Maryland Extension gives the commercial recipe as 85°F and 80 to 90 percent humidity for five to ten days. Illinois stretches it to 10 to 14 days. Penn State allows 80°F for two weeks. Any of those works, because the common thread is heat and moisture together.
No home has a room like that, so improvise. My cure is a plastic storage tote with the lid set on loosely, in the warmest spot in the house. A damp towel sits in the bottom under a rack. Likewise, a closed room with a space heater and a bucket of water works, and so does a greenhouse in a warm October. A porch or a covered patio gives a partial cure in a warm fall, which Maryland Extension accepts as good enough. Meanwhile, check the tote every few days for condensation dripping onto the roots, and wipe it out. After ten days, the skin is tougher and the scrapes have closed. A test root baked in the oven tastes as it should.
Storing the Crop Until Spring
After the cure, the last job in growing sweet potatoes is to find the roots somewhere cool and dark. The target is 55 to 60°F with high humidity, and a basement or an unheated closet on a north wall is usually close. A refrigerator, however, is too cold, and below 50°F the flesh develops hard spots and an off flavor within a couple of weeks. A root cellar storage space set up for squash suits sweet potatoes as well. The same handling rules apply as in storing winter squash. Finally, pack them in a single layer in boxes lined with newspaper, and never in a sealed bag.
Stored this way, a cured crop lasts until March or April, and the sweetness keeps increasing for the first six weeks. Then check the boxes monthly and remove anything soft. Save a few of the best roots for next spring. The ones you grew yourself sprout more readily than anything from the store, and a single root gives you a bed’s worth of slips.
Varieties Worth Growing
Beauregard is the standard orange variety, because it is quick at 90 days and reliable in the north. Georgia Jet is faster still, so it is the one to choose where the summer is short. Covington is the commercial variety from North Carolina, with a fine texture and good storage. For a container or a small bed, Vardaman and Porto Rico are bush types with short vines. Japanese and Korean varieties, such as Murasaki, have purple skin, white flesh, and a drier and nuttier root. They also store longer than the orange types. Grow two when growing sweet potatoes, one fast and one for keeping, and you have the winter covered.
Frequently Asked Questions
Can I grow sweet potatoes from a store-bought potato?
Yes, as long as you wash it well to remove the sprout inhibitor and keep it warm. Certified slips carry less disease, and they are the safer choice in the South, where the weevil lives. In the north, a store root works fine.
How long do sweet potatoes take to grow?
Growing sweet potatoes takes 90 to 120 days from planting the slips, depending on the variety. Then add six weeks for raising your own slips, and plan the whole season around the first fall frost.
Why are my sweet potatoes long and thin?
Usually too much nitrogen, which grows vine at the expense of root. A heavy clay soil that the roots cannot swell in does the same. Occasionally the slips went in too shallow, with no nodes buried.
Do sweet potatoes need to be cured?
They are edible without it, but they taste starchy and they will not keep past a few weeks. Ten days of warmth and humidity heal the skin and turn starch into sugar. It is the one step in growing sweet potatoes you should never skip.
Check out the author’s book here: The Year-Round Vegetable Garden for Beginners.


Leave a Reply