

Worm castings have a reputation that runs well ahead of the evidence. Bags are sold as “black gold” and “superfood”, and some growers expect them to replace fertilizer altogether. In reality, castings are a gentle, variable amendment that does a few things very well and other things poorly. Using worm castings well means knowing how much to add, where they help most, and what results to expect. This guide covers all three, based on extension advice rather than marketing claims.
What Worm Castings Actually Are
Worm castings are the material left behind after worms digest organic matter. In a home bin, red wigglers eat kitchen scraps and bedding, and after several months the bottom of the bin fills with dark, crumbly castings. The Oregon State University Extension handout on worm composting describes them as generally neutral in pH and containing nitrogen, phosphorus and other nutrients and minerals.
The texture is part of the appeal, since castings are fine and uniform, so they blend easily into potting mix and spread evenly around small plants. They also smell like damp earth rather than manure, which makes them pleasant to handle indoors. If you want to produce your own, an indoor worm bin takes very little space.
Using Worm Castings as a Fertilizer: Keep Expectations Modest
Here is the part most product labels skip. The LSU AgCenter reports that the nutrient content of castings ranges from about 1-0-0 to 5-5-3, depending on what the worms were fed and how the castings were stored. That is a wide spread, and in practice one bag may be a mild soil conditioner, while another carries a useful dose of nutrients.
LSU also points out two properties that shape how castings behave. First, much of the nutrient load is water soluble, so it is lost when castings are exposed to rain or heavy watering. Second, the particles carry a coating that releases nutrients slowly, which is why castings are unlikely to burn plants. Even fresh castings are mild enough for sensitive plants.
For that reason, using worm castings makes most sense as a slow, gentle supplement. A hungry crop such as sweet corn or cabbage will still need a proper feeding program. The guide to Organic Plant Food: Feeding Your Veggies for Maximum Growth covers stronger options for those crops.
What Castings Do Better Than Fertilizer
Castings add organic matter along with nutrients, and that changes how soil holds water and air. They also bring micronutrients that bagged fertilizers often lack. LSU lists iron, sulfur, magnesium, zinc, copper and calcium among them. The article on soil organic matter explains why that slow build-up matters more than any single feeding.
How Much to Use: Rates for Using Worm Castings
Most of the confusion comes down to quantity. The good news is that extension sources give simple, practical rates.
- Around established plants: Oregon State suggests spreading a layer of about half an inch of castings around your plants and watering it in.
- Per plant, by size: the UC Santa Barbara Department of Public Worms suggests roughly 1 square inch of castings on the soil surface, evenly on all four sides, for every 2 to 3 inches of plant height.
- In seedling mix: Oregon State recommends 3 parts aged compost to 1 part castings.
UCSB adds a useful caution about age. Mature plants older than six weeks are hard to overdo. However, plants younger than six weeks, or transplanted within the last two weeks, should get less. Succulents and cacti grow slowly, so they need only a light sprinkle.
Using Worm Castings Before Planting
When you prepare a bed, blend the castings into the top few inches of soil together with compost or other amendments. UCSB recommends waiting 1 to 2 days before transplanting, so young roots are not shocked by a sudden concentration of nutrients. Watering the bed for a few days before planting also helps even things out.
However, do not soak the soil, because UCSB warns that soggy ground drains away the mobile nitrogen, which is the part young plants use first. Moist, not muddy, is the target.
Castings also pair well with other soil builders, so if you are filling a new bed, the raised bed soil mix guide shows how they fit into the overall recipe. For a broader view of what each additive does, see the overview of soil amendments.
Using Worm Castings as a Top-Dressing
Top-dressing is the easiest way of using worm castings once plants are in the ground. Spread the castings at the base of the plant, scratch them lightly into the surface, and water gently. LSU recommends working them in lightly rather than leaving them loose on top. The nutrients then move down toward the roots each time you water.
After that, cover the area with mulch. A layer of straw or shredded leaves protects castings from drying out and from heavy rain that would wash the soluble part away. The guide to organic garden mulch explains which materials suit which crops.
When to Top-Dress
Timing matters more than amount, and a top-dressing makes most sense when plants shift into heavy growth: tomatoes as the first flowers open, leafy greens a few weeks after transplanting, and squash as the vines start to run. A second, lighter application halfway through the season is usually enough.
Using Worm Castings in Containers and Seed Starting
Containers are where castings earn their place. Potting mix holds a limited amount of nutrients, and frequent watering flushes them out. A small share of castings adds both nutrients and organic matter without making the mix heavy.
For seedlings, follow the Oregon State ratio of 3 parts aged compost to 1 part castings, or blend a similar share into a commercial seed-starting mix. Because castings are mild, they rarely harm tender roots. Still, keep the mix light and well drained, since soggy trays invite problems such as damping off disease.
For larger pots, mix castings into the potting soil before planting and top up with a thin layer mid-season. The guide to the best soil for container vegetables covers the rest of the recipe. When seedlings are ready to move outdoors, hardening off plants first will protect the head start the castings gave them.
Where Using Worm Castings Pays Off Most
Castings are not cheap, whether you buy them or wait months for a bin to fill. It therefore pays to put them where they make the biggest difference, rather than spreading a thin layer over the whole garden.
- Seedlings and young transplants. Small root systems benefit from a mild, slow source of nutrients that will not scorch them. This is where the gentle nature of castings is an advantage rather than a limit.
- Containers and window boxes. Potting mix runs out of nutrients quickly, and castings add both food and organic matter to a small volume of soil.
- Leafy greens and herbs. Lettuce, chard, basil and parsley grow steadily rather than in bursts, so a slow release suits them well.
- New or tired beds. Soil that is low in organic matter gains structure as well as nutrients, especially when castings go in alongside compost.
On the other hand, castings add little to a bed that is already rich in organic matter and well fed. In large plots, compost does the same structural job at a fraction of the price. Keep your castings for the places listed above, and you will notice the difference far more clearly.
Worm Casting Tea: How to Brew It
Some gardeners prefer to apply castings as a liquid. UCSB gives a straightforward method:
- Place castings in a cloth bag, at about a quarter cup per quart of water, or 1 cup per gallon.
- Use filtered or non-chlorinated water, since chlorine can harm the microbes.
- Add an aquarium aerator if you have one; otherwise, stir or shake the mixture several times a day.
- Brew for 24 to 48 hours, then use it promptly.
LSU notes that steeping castings for a day or two gives a mild tea that is useful for young seedlings. Even so, it helps to keep claims in proportion, because a tea spreads a small amount of castings over a large area, so its nutrient effect is modest. For more detail on brewing, see the compost tea recipe guide.
Oregon State also mentions the liquid that drains from the bottom of a worm bin. It can be used as a liquid fertilizer, although it is best diluted, since its strength varies from bin to bin.
Storing Worm Castings So They Keep Their Value
Castings are alive with microbes and partly water soluble, so storage makes a real difference. According to LSU, properly stored castings last six months or more. Store them away from direct sunlight and away from big swings in temperature. They should stay moist but not wet, crumbly and slightly damp to the touch.
A lidded bin in a shed or garage works well. Avoid sealing wet castings in airtight plastic, because they can turn sour. If a stored batch dries out completely, moisten it lightly before use.
Common Mistakes When Using Worm Castings
- Expecting fertilizer strength. Castings range from 1-0-0 to 5-5-3, so heavy feeders still need a full feeding plan.
- Leaving them exposed. Castings left on bare soil in heavy rain lose much of their soluble value. Work them in and mulch over them.
- Planting straight into a freshly amended bed. Allow a day or two before transplanting, as UCSB advises.
- Drowning the bed. Soggy soil washes away the mobile nitrogen, which is exactly the part young plants use first.
- Ignoring the soil test. Castings will not correct a serious pH or nutrient problem. How to read a soil test report helps you see what your beds actually lack.
Frequently Asked Questions
Can worm castings burn plants?
That is unlikely, and LSU explains why. It notes that castings can be used fresh without burning plants, because their coating releases nutrients slowly. Young or newly transplanted plants still do best with a lighter dose.
Are homemade castings as good as bagged ones?
Often they are better, since you control what the worms eat and how fresh the castings are. Quality depends on feed and storage in both cases, so a varied diet for the worms gives richer castings.
Is using worm castings instead of compost a good idea?
Not really, because the two work best together. Compost adds bulk and organic matter cheaply, while castings add a finer, richer layer. Regular composting plus a smaller amount of castings is the most economical approach.
How often should I apply them?
Once at planting and once in mid-season is enough for most vegetables. Containers may need a light top-up more often, because watering flushes nutrients out faster.
Final Thoughts
Using worm castings pays off when expectations match what castings are: a mild, slow, nutrient-variable amendment that improves soil and suits young plants. Mix them in a day or two before planting, top-dress at the start of heavy growth, protect them with mulch, and store the surplus cool and damp. Used this way, a modest amount goes a long way.
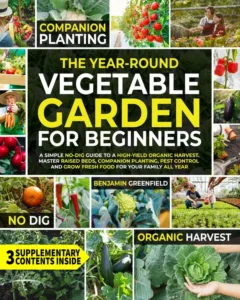
Check out the author’s book here: The Year-Round Vegetable Garden for Beginners.

Leave a Reply