
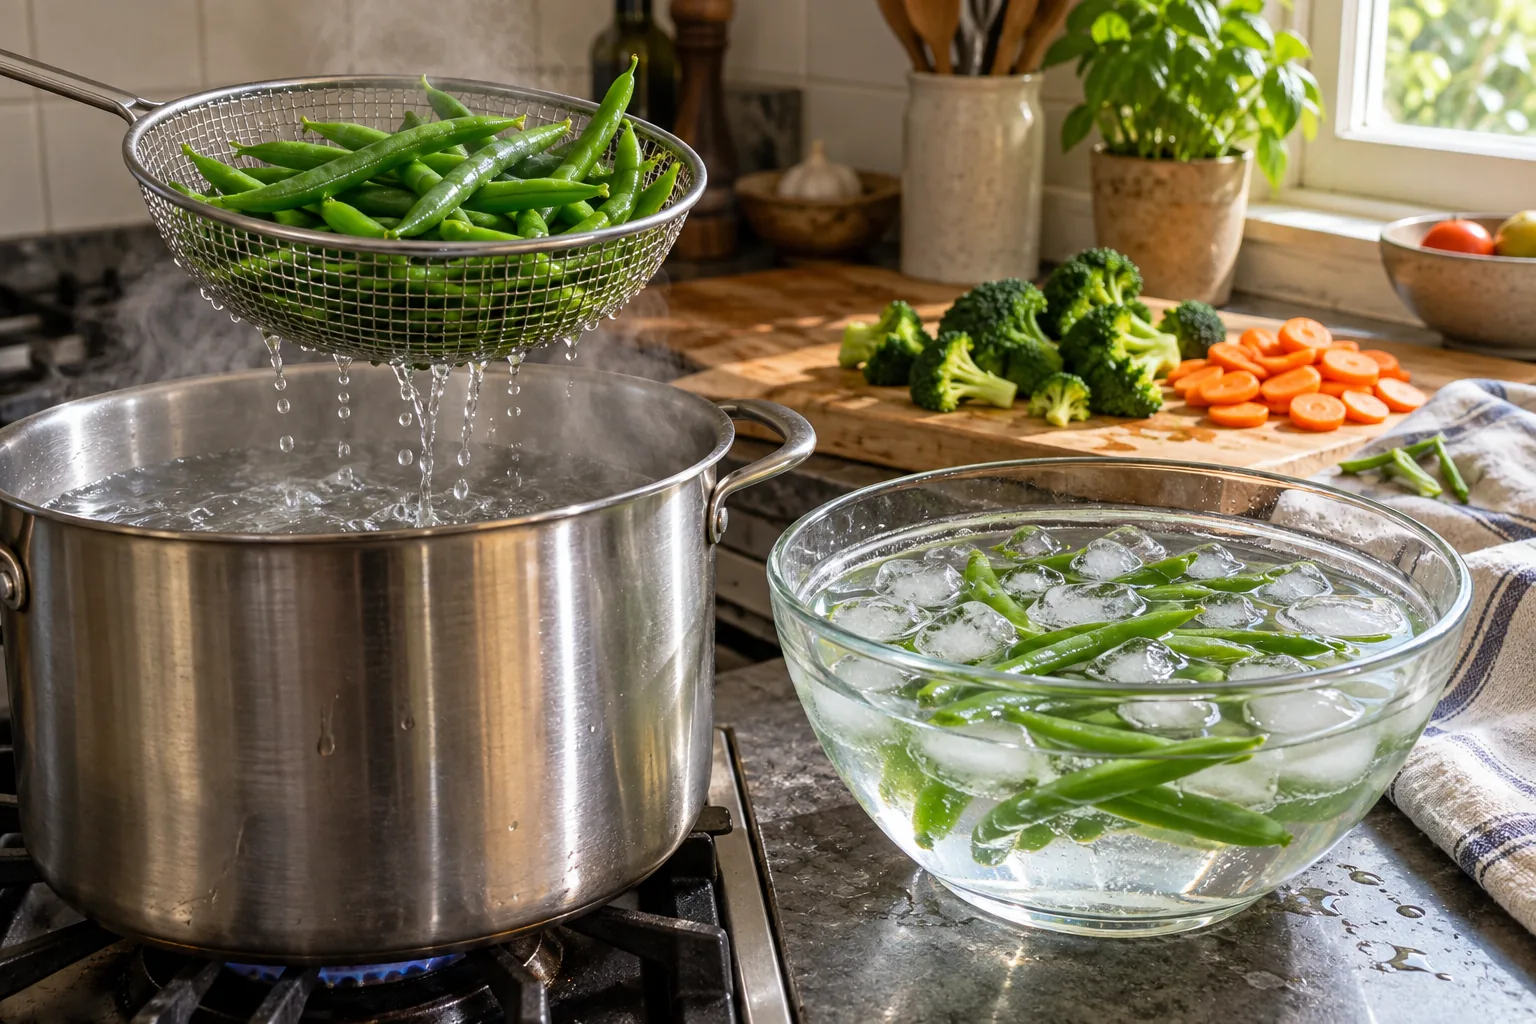
A good summer leaves most gardeners with more beans, broccoli and corn than they can eat. The freezer is the easiest way to keep that harvest, but vegetables frozen raw often come out dull, tough and oddly flavoured months later. The fix takes only a pot of boiling water and a bowl of ice. Blanching Vegetables before freezing keeps them close to the way they tasted on the day you picked them.
This guide explains why blanching works, how to do it with boiling water or steam, and how long each common crop needs. The advice comes from the National Center for Home Food Preservation, Clemson Home and Garden Information Center and Penn State Extension.
Why Blanching Vegetables Matters
Vegetables keep living after harvest. Enzymes inside them go on working, even in the freezer, and slowly break down colour, flavour and texture. According to Clemson, blanching stops those enzyme actions. The National Center adds that it also cleans dirt and microorganisms from the surface. As a bonus, it brightens the colour and helps slow the loss of vitamins.
Blanching also wilts leafy greens and softens some vegetables, so they pack more easily. In other words, a quick dip in boiling water makes the rest of the job simpler.
Clemson makes one point very clearly: timing matters in both directions. Under-blanching stimulates enzyme activity, which makes it worse than not blanching at all. Over-blanching, on the other hand, partly cooks the vegetables and costs flavour, colour, vitamins and minerals. So the goal is precise, not approximate.
Start with the Right Harvest
Blanching cannot improve a poor vegetable. It only preserves what you already have. Therefore, freeze produce at its peak, ideally within hours of picking. Beans should snap, peas should be sweet, and corn should be in the milk stage. If you are unsure when each crop is ready, A Beginner’s Guide to Harvesting Vegetables: Knowing When to Pick goes through the signs crop by crop.
Next, wash everything. Penn State advises rinsing produce under cold running water, gently rubbing or scrubbing it with a clean vegetable brush. Then trim, cut and sort the vegetables by size, so that each batch blanches evenly.
Equipment for Blanching Vegetables
You need very little:
- A large pot with a lid. Clemson notes that a blancher with a basket and cover works best, but a wire basket inside a big pot does the same job.
- A wire basket or strainer. It lets you lift the whole batch out at once.
- A large bowl or sink of ice water. Keep plenty of ice ready before you start.
- A timer. A few seconds make a difference with small vegetables.
- Clean towels and freezer containers. You will need them for draining and packing.
How to Water Blanch Vegetables
Water blanching is the standard method for most vegetables. The National Center recommends 1 gallon of water for each pound of prepared vegetables. That ratio matters, because too little water cools down too much when the vegetables go in.
Follow these steps:
- Bring the water to a rolling boil. Keep the lid on so it heats quickly.
- Add one pound of vegetables. Lower them in the basket and cover the pot.
- Wait for the boil to return. Penn State says to start counting the blanching time only when the water returns to a boil.
- Keep it boiling. Hold a gentle boil for the full time listed for that vegetable.
- Lift and cool at once. Move the basket straight into ice water.
You can reuse the same water for several batches. Just add more when the level drops, and let it come back to a full boil each time.
Steam Blanching Vegetables
Steam is a gentler alternative. Here, the vegetables sit in a basket above a few inches of boiling water, with the lid on. Penn State notes that steam blanching usually takes 50 percent more time than water blanching and suits delicate vegetables.
Clemson lists broccoli, pumpkin, sweet potatoes and winter squash as good candidates. For example, the National Center gives broccoli 3 minutes in water, but 5 minutes in steam. Spread the pieces in a single layer so the steam reaches every one.
Cooling After Blanching Vegetables
Cooling is half of the process. Without it, the heat inside the vegetables keeps cooking them, and they turn soft. The National Center says to plunge vegetables into ice water for the same length of time as the blanching. Clemson adds that the water should be 60°F or below.
Penn State suggests 3 to 4 gallons of cold water for each pound of vegetables, and says to chill them at least as long as they were blanched. Add ice as it melts. When the vegetables feel cold right to the centre, drain them well. Spread them on a clean towel for a few minutes, because extra water turns into ice crystals in the freezer.
Blanching Times for Common Vegetables
These times from the National Center are for water blanching, counted from the moment the water returns to a boil:
- Green or snap beans: 3 minutes
- Broccoli florets: 3 minutes in water, 5 in steam
- Cauliflower florets: 3 minutes
- Carrots, sliced or diced: 2 minutes. Penn State gives whole small carrots 5 minutes.
- Green peas: 1½ minutes
- Spinach and other greens: 2 to 3 minutes
- Summer squash, sliced: 3 minutes
- Pepper strips: 2 minutes
- Okra, small pods: 3 minutes
- Asparagus, small spears: 2 minutes, according to Penn State
- Corn on the cob, medium ears: 9 minutes
Adjust for size. Thick pieces need the longer end of any range, and small ones the shorter. In the same way, cut everything in a batch to a similar size, so the whole pound finishes at once.
Blanching Vegetables from Your Own Beds
Some crops come in waves, so it pays to plan. Beans, peas and summer squash can all be sown in short rows every few weeks; Succession Planting: A Guide to Continuous Harvests explains the method. Then you can blanch a pound or two at a time, instead of facing a mountain of produce in one weekend.
Zucchini is the classic glut crop. Slice it and blanch it for soups and bread, and pick the fruits small; Growing Zucchini: Spacing, Pollination, and Picking Before They Turn Into Clubs shows why. Likewise, sweet corn loses sugar fast after picking, so blanch it the same day; Growing Sweet Corn: Master Pollination for Plump Backyard Kernels covers when the ears are ready.
For broccoli and cauliflower, soak the heads in salted water for half an hour first to drive out small caterpillars. Growing Brassicas: Cultivating Broccoli and Its Relatives in Your Backyard explains how to grow firm, tight heads worth freezing.
Vegetables That Skip Blanching
Not every vegetable needs it. Several extension guides note that diced onions, green onions, leeks and peppers can go into the freezer without blanching. Peppers, in particular, keep a crisp bite when frozen raw. If you grow them, Bell Pepper Cultivation: A Beginner’s Guide to a Bountiful Harvest covers the crop.
On the other hand, some vegetables should not be frozen at all. Lettuce, radishes and cucumbers turn limp and watery. Similarly, many crops store better whole. Winter squash, potatoes, onions and carrots keep for months without any heat treatment; Root Cellar Storage: Why One Room Cannot Hold Everything explains how to store them.
Packing and Freezing
Pack the cooled vegetables in containers that are moisture- and vapour-resistant, durable and leak-proof, as Penn State puts it. Freezer bags, rigid plastic boxes and glass jars made for freezing all work.
Penn State recommends ½ inch of headspace in all containers, so the food can expand. Loose vegetables such as asparagus and broccoli need none. Squeeze as much air as possible out of bags, then seal, label and date each one.
For loose, free-flowing vegetables, try a tray pack. Spread the blanched pieces on a baking sheet, freeze them until hard, then tip them into a bag. As a result, you can pour out just the handful you need.
Finally, keep the freezer at a constant 0°F or lower, Penn State advises. A full freezer holds its temperature better, but add only a few pounds of unfrozen food at a time, so it freezes quickly.
Cooking Frozen Vegetables
Blanched vegetables are already partly cooked. So cook them straight from frozen, and for less time than fresh ones. A few minutes in a steamer, a pan or a soup is usually enough. Overcooked, they lose the colour and bite that blanching worked so hard to save.
Freezing, done well, also keeps much of the food value you grew. For more on getting the most from your crops, read Maximizing Nutrient Density in Homegrown Vegetables.
Make Blanching Vegetables a Summer Habit
Blanching vegetables takes a few minutes per batch, yet it decides whether your winter beans taste of summer or of cardboard. Keep a big pot, a basket and a bag of ice ready from June. Pick in the morning, blanch before lunch, and your freezer will fill a pound at a time.
Check out the author’s book here: The Year-Round Vegetable Garden for Beginners.


Leave a Reply